Blog.SSHKit.com — How to Install Speedtest CLI & GUI on Windows. You can check your internet speed using speedtest. On Windows, you can test network speed directly in the Speedtest application. The results of the download and upload speed testing will appear in the Speedtest application, so you don’t bother testing on the Speedtest website anymore. For how to install it, you can see the short tutorial below.
Install SpeedTest CLI in Windows
You can add the speedtest command to your CMD or Powershell by using the speedtest CLI.
1. First, download the speedtest CLI for windows using the link below:
https://install.speedtest.net/app/cli/ookla-speedtest-1.1.1-win64.zip
2. Extract the file, then copy the speedtest.exe file to the c:/windows/system32 folder on your windows.

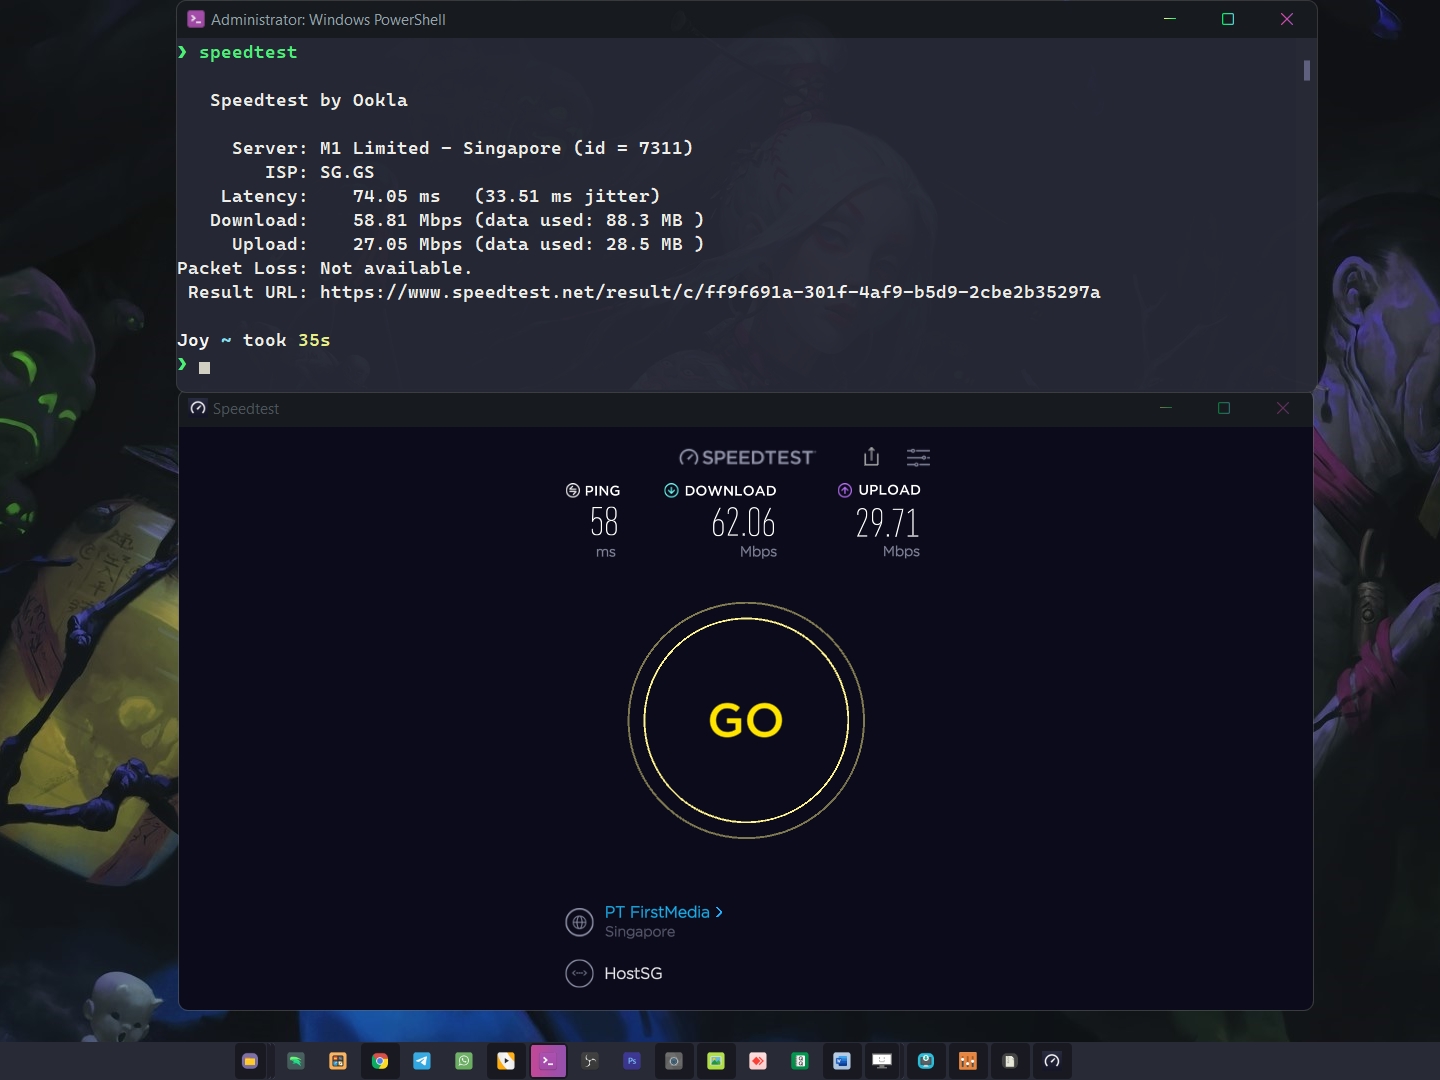
4. Finally, please open CMD or Powershell as Administrator. Then type the following command:
speedtest
5. If there is a question “Do You Accept the license?” please type the command YES.
6. Then the output of your internet speed test results will appear. You can copy the result link in the output section and then open it in the browser to see the details of your internet test.

Install Speedtest GUI in Windows
You can also install the Speedtest application with a look like on the website.
1. First, download the app using the following link:
Windows 7 (32 bit): https://install.speedtest.net/app/windows/latest/speedtestbyookla_x86.msi
Windows 7 (64 bit): https://install.speedtest.net/app/windows/latest/speedtestbyookla_x64.msi
Window 10/11: https://www.microsoft.com/en-us/store/p/speedtest-by-ookla/9nblggh4z1jc
2. Download and install the speedtest application using the link above. Once installed, please open the application and click GO to test.

Done.

