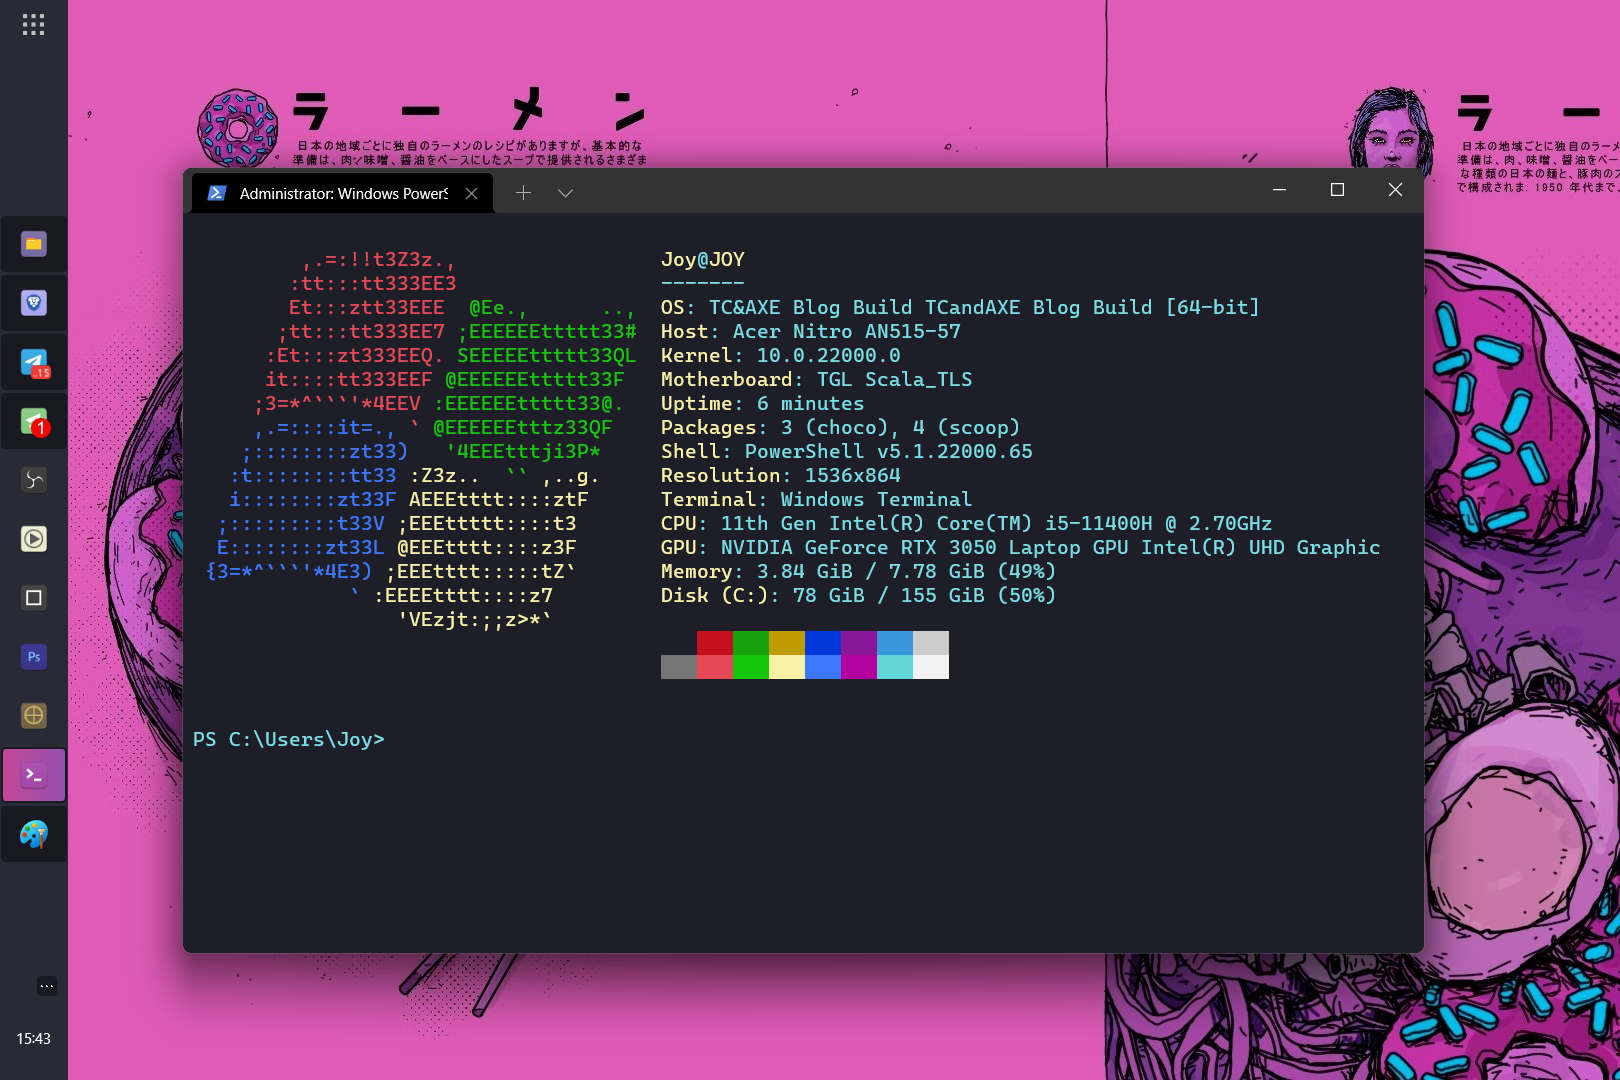
Blog.SSHKit.com — How to Install Neofetch on Windows. For those of you Linux users, maybe you are already familiar with Neofetch. Neofetch is a tool that displays information about the operating system, and the hardware you are using in an aesthetically pleasing and attractive appearance. This information is displayed in the form of text and symbols that form the icon of your operating system in Terminal. However, can neofetch be installed on Windows? Of course you can, by following the short tutorial below, you can use Neofetch like on Linux.
Install Neofetch on Windows (Winfetch)
Actually you can use the Neofetch application , but installing Neofetch on windows is sometimes difficult. This is because errors often occur in the installation process. And sometimes neofetch can’t display any information at all (author’s experience).
Therefore, you can try another alternative called Winfetch . Winfetch has better performance than Neofetch, and we highly recommend that you use this app. Without further ado, here are the steps.
Step 1: First, make sure you are connected to the internet. Then open Windows Terminal or Powershell .
Then enter the following command:
Set-ExecutionPolicy RemoteSigned -scope CurrentUser
Copy and Paste the above command and press Enter.

Then enter the commands below again and do the same.
Invoke-Expression (New-Object System.Net.WebClient).DownloadString(‘ https://get.scoop.sh’ )
scoop install git
scoop bucket add extras
scoop bucket add java
scoop install winfetch
Copy one by one the above commands then Paste and then press enter . Make sure the order is correct.

Step 2: Once done, you can try to open Winfetch by typing the Winfetch command .
Step 3: If you want winfetch to open automatically when you open Powershell or Terminal, you can open Powershell or Terminal , then enter the following command:
New-Item $profile -Type File -Force

Then open the Document > Windows Powershell folder then right-click the Microsoft.PowerShell_profile.ps1 file and select Edit or you can open it using a text editor like Notepad++ .

Next, you just enter winfetch in the file, then save.

Step 4: Reopen your powershell or Windows Terminal. Then Winfetch will open automatically. Done

For customization in the image section or ASCII Art Winfetch , we will discuss it in another article. Good luck and hopefully useful.

