
Blog.SSHKIT.com — How to Fix “Unable to Start Windows Subsystem for Android” error . Windows 11 has officially supported the android app on its system. By using the Windows Subsystem For Android as the Android base, Windows 11 can be installed with virtualized android applications. However, sometimes when opening the WSA application, the message “Unable to Start Windows Subsystem for Android” appears. The message appears due to the inactivity of Hyper-V or the virtualization component on your Windows 11. For more details, follow the discussion and solutions below.
Fix “Unable to Start Windows Subsystem for Android” Error
There are several methods you can do to activate this Hyper-V. Here are the methods.
Enabling the Virtualization Feature or Hyper-V
The first thing you can do is activate the virtualization feature or component in your Windows 11.
1. First open the start menu. Then search for ” Turn windows features on or off “. No quotes.
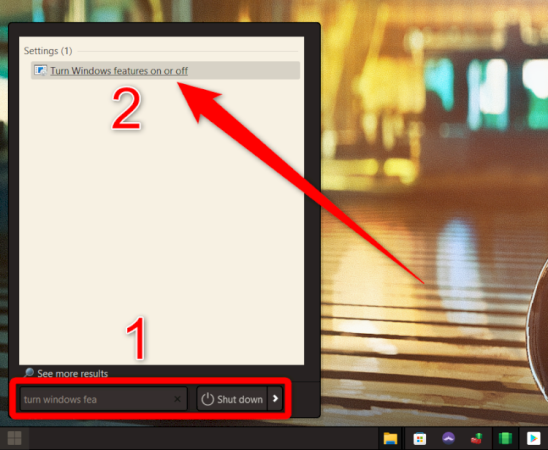
2. Open the menu, then check the following 3 components:
- Hyper-V
- Virtual Machine Platform
- Windows Hypervisor Platform

3. After that click OK and wait for the process. When finished, click Reboot to restart your Windows 11.
4. Finally, after restarting, reopen Windows Subsystem For Android . If there is no error message then the method was successful, if not continue to the next method.

Activating Hyper-V Via EasyBCD
If the above method doesn’t work, you can activate Hyper-V using EasyBCD.
1. First download the EasyBCD application using the following link:
https://m.majorgeeks.com/mg/getmirror/easybcd,1.html
2. After that install and open the EasyBCD application. Click the Advanced Settings menu > Click the Developer Menu > Select your OS > Check Enable Hyper-V Support .

3. Finally click Save Settings . Then restart your Windows.

4. Then try to open the WSA application again, if there is still an error message, continue to the next method.
Enabling Hyper-V Services
We go to the last method, sometimes when the hyper-v feature is active but cannot be used, it is because the Services are not running. Here’s how to enable it.
1. First, open the start menu and search for ” Services ” . msc ” without the quotes.

2. Open the menu and look for the following 2 services:
- Hyper-V Virtual Machine Management
- Hyper-V Host Compute Service
3. If disabled or stopped, right -click the Services and select Properties .

4. Then change the Startup Type to Automatic > Click Start > Apply and then click Ok . Do this for each of the 2 services earlier.

5. Then try to open your WSA application again.
Finished.
Conclusion
That’s it for “How to Fix “Unable to Start Windows Subsystem for Android” error” tutorial, with virtualization turned on on your Windows 11, it will allow WSA to run smoothly. Hope it is useful.


